How to Automate Your Social Media Content
Disclaimer: This post contains affiliate links that will provide me commission when purchased. I only promote brands that I use and love. Thank you for continuing to support the brands that support Dash of Social®!
One of the most common issues people face when it comes to marketing is spending way too much time writing content, planning it, and scheduling it. What they DON’T know is that social media posting can easily be automated — which is what I help a lot of my clients to achieve. They like to refer to me as the Queen of Automation 😉 (Okay, maybe I refer to MYSELF as that… but I’ve really nailed it down pat!)
Automating my content has been an absolute breeze through Viraltag. Not only is it an amazing social media scheduler, but it also has the lifesaving evergreen content feature that allows you to batch a whole bunch of posts into a queue, set a posting schedule, and watch content get sent out on the fly. The popular saying goes something like, “The shoe cobbler doesn’t have shoes” — which is 100% true. I teach my clients how to do this, but I barely had time to do this myself! That’s why it’s so important (and EASY!) to set yourself up with an automation software like this one so that you don’t have to worry about getting new content out there when you feel like you’re doing all the things.
Here’s my 3-step process for preparing your content to be sent out *literally* while you sleep through Viraltag!
Set your posting schedule
By connecting your Google Analytics to the platform, they’re able to pull your information directly to find out the exact times your audience is most likely to see your content — which you can then use to determine when your posts will be sent out.
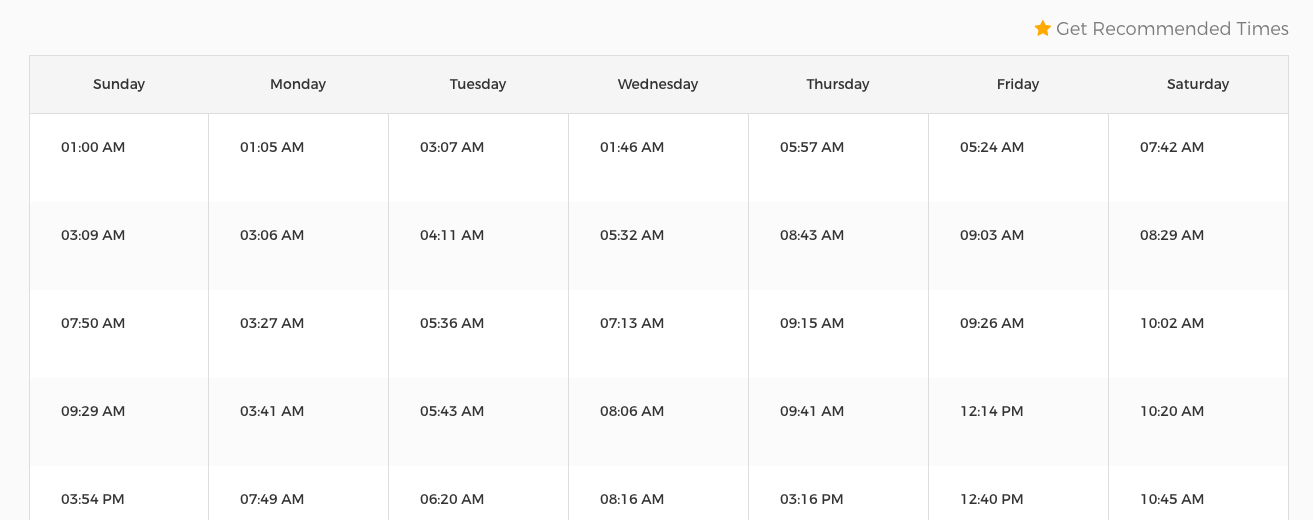
Click on the “Posting Schedule” tab and then select “Get Recommended Times.” A whole bunch of times will pop up for each day of the week, and all you have to do is click the plus sign next to each one for them to be added to your posting schedule — as shown above. When you add posts to your queue, they will be sent out at these times that you select, as long as you don’t already have content scheduled for those times.
I find it weird, but also kind of cool, that for Sunday-Thursday, the majority of my times are super early in the morning. This gives me more insight into my audience, as it must mean that my followers are either a) in different time zones or b) insomniacs 😉 Interesting either way!
Write your content and add it to the queue
I personally prefer to batch write my content (part of that automation process!), which means it’s easier for me to write a week of content at once rather than new content every single day — but it really depends on whatever works for you. To start adding posts into the queue, click the + in the top left corner, select the platform, write the post, make sure to hit the evergreen button in the bottom left corner, and then select “Add to Queue.”
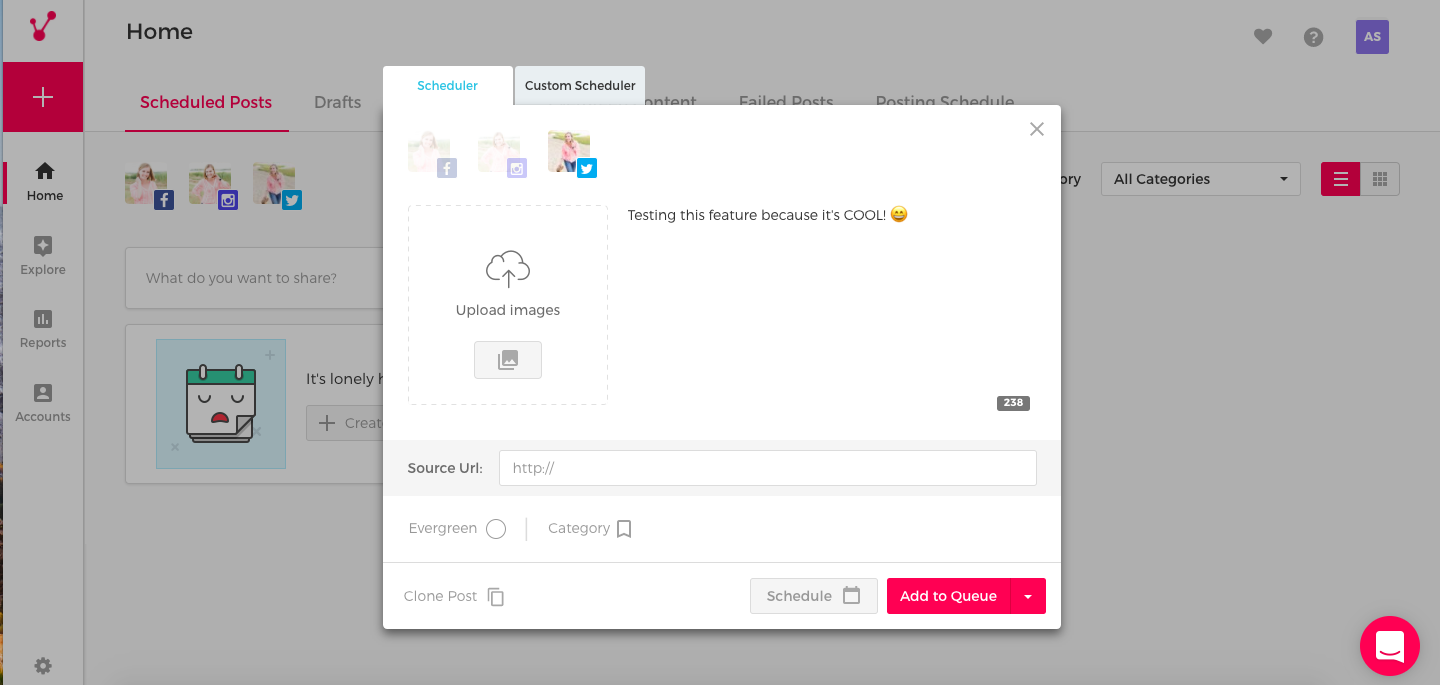
Selecting the circle next to “Evergreen” is extremely important because that is what will allow your content to keep being sent out — if you just had add it to the queue only, it will only be posted once and that’s it.
Monitor the evergreen content
It’s vital to keep checking on your evergreen content to make sure that the content is still relevant to you and your audience and that all links are still working and not broken. I actually went through my entire evergreen queue a few weeks ago and deleted everything because the content I had in there just wasn’t resonating with my audience, and I wrote all of those posts before Twitter changed its character limit to 280 characters — which means I now had more space to include more words in my tweets.
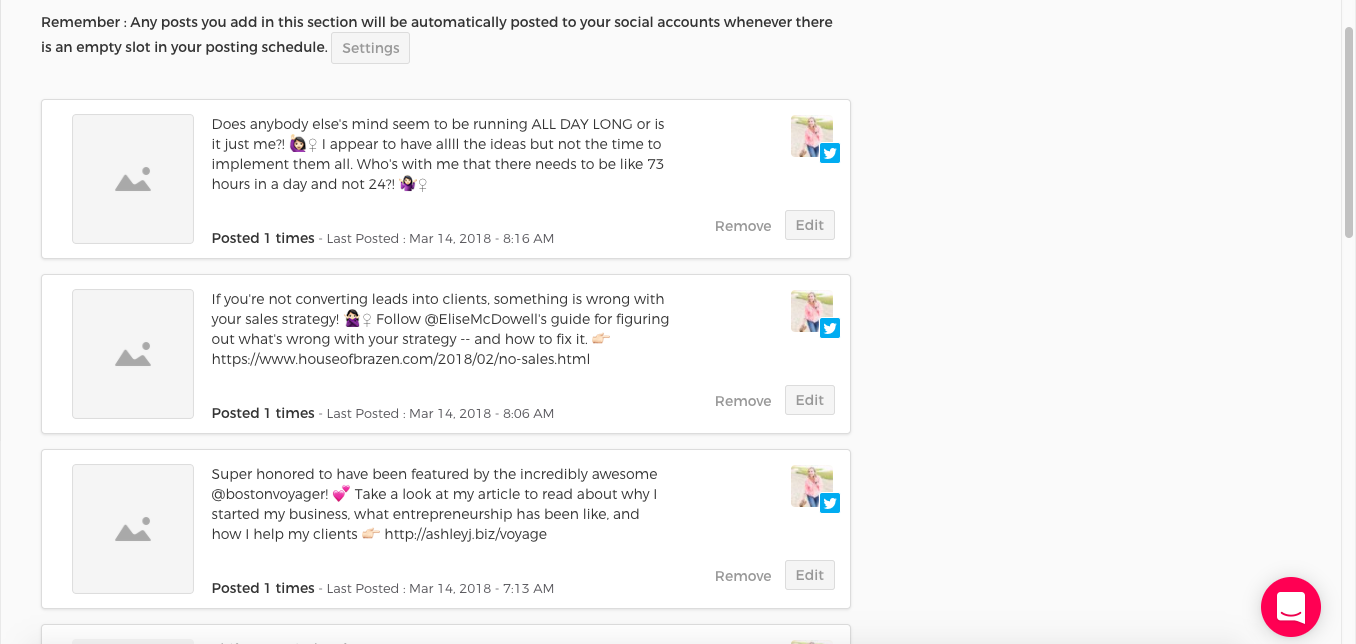
To access your evergreen content, select the “Evergreen Content” tab and the appropriate platform. You’ll see all of your posts in the queue as well as how many times they’ve been posted and the date of the last post! Many people worry that by adding posts to an automatic queue like this, the same post will get shared over and over and over again — but that’s not the case. You can actually change the settings of how often a post repeats itself to prevent this. I set mine so that the same tweet doesn’t get repeated twice within two weeks — which is plenty of time because Twitter is such a quick platform. You can change this setting by selecting “Settings” under the “Evergreen Content” tab.
That is basically how to automate your content with Viraltag in a nutshell — I wish I had tracked how many hours this system saved me when it came to writing and scheduling content. Honestly. Here’s my challenge for you: batch some content and input it to whatever scheduler you use. Watch the content roll out and you’ll be GOLDEN!